
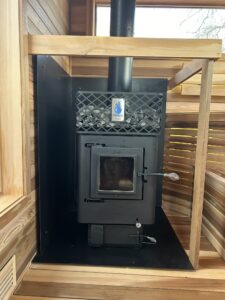

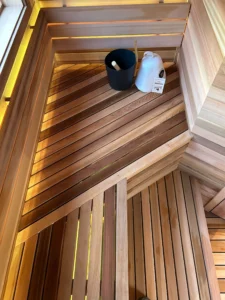
We Tested This Inside the Sauna
When it comes to installing cladding inside a sauna, spacing is everything, but not in the way you might think. Unlike exterior cladding (which faces rain, snow, and everything in between), sauna interiors deal with something else entirely: heat and dryness. That means the way wood behaves here is unique, and planning for wood movement is key. Here’s what we’ve learned through testing and experience.
Think About Wood Movement
When you’re installing tongue and groove paneling for your sauna, wood movement is your first concern. Saunas are dry environments, which sounds a bit ironic; but it’s true. So, your wood won’t expand much after install. In fact, it’s more likely to shrink.
Step One: Let the Wood Acclimate
Before doing anything else, you need to let the wood acclimate to the space. If it’s bundled under a tarp or sitting outside, bring it in. The goal is to get the moisture content as low as possible before installation.
- Use a fan to encourage air movement and speed up drying.
- If you can separate rows with small wood pieces, even better.
- Keep the wood stacked in one large pile to retain weight and help prevent warping or twisting.
Pro tip: Buy kiln-dried wood and avoid “green” lumber. As wood dries, it shrinks, and in a dry sauna, it’ll only shrink more after installation if not properly acclimated.
Step Two: Prep the Wall for Install
Before you start attaching any boards, set the scene:
- Use furring strips behind the paneling. This promotes airflow and helps the wood dry evenly.
The furring also helps the foil vapor barrier do its job and limits long-term wood movement.
Step Three: Install it Tight
Now it’s time to install the paneling, and here’s one thing we can’t stress enough: install it as tightly as possible.
Fastening: Use a narrow crown staple. You can fasten through either the tongue or groove, but groove is preferred for a cleaner, concealed finish. If you must fasten through the tongue, aim toward the top of the tongue at a 45° angle downward to avoid interfering with the next board.
Nail guns with 15, 16, or 18 gauge can also be used, but only with stainless steel fasteners. Period.
Dealing With Bowed Boards
If a board is bowed, skip it if possible. But if you must use it:
- Use a pry bar hammered next to the spot that needs adjustment.
- Lever it over until it fits snugly.
- For the nickel gap, you’ll feel when it’s right; it locks in naturally.
- For V-groove, push until the grooves touch perfectly.
- Use scrap pieces as spacers to double-check your gaps.
Our Wood Recommendations
If you’re using cedar, we highly recommend 1×4 cladding. It’s narrower than the traditional 1×6, meaning there’s less material per board to shrink. We’ve seen 1×6 cedar shrink as much as 1/4 to 3/8 of an inch, that’s significant.
Looking beyond cedar? We’re huge fans of the wood products from Thermoryusa. We’ve installed their products multiple times and can’t say enough good things. Their boards are:
- Straight
- Smooth
- Perfectly finished
- Consistently color-matched
- Extremely stable
- They align with our values and help create a luxurious and beautiful sauna without outrageous prices.
Heat Expansion in Sauna Building: What We Consider
Building a sauna isn’t just about wood; it’s about how wood behaves under heat and dryness. In a high-heat, low-moisture environment, expansion isn’t the main issue, shrinkage is. That’s why we:
- Choose the right wood and size
- Allow time for proper acclimation
- Install cladding tightly, with room for minor movement
- Use proper backing and fasteners
- Avoid using warped materials unless absolutely necessary
- Each step ensures your sauna stays beautiful, functional, and safe over time.
BW Is Here For You
Need help with your sauna build or materials? Reach out! We’re happy to share more of what we’ve learned.