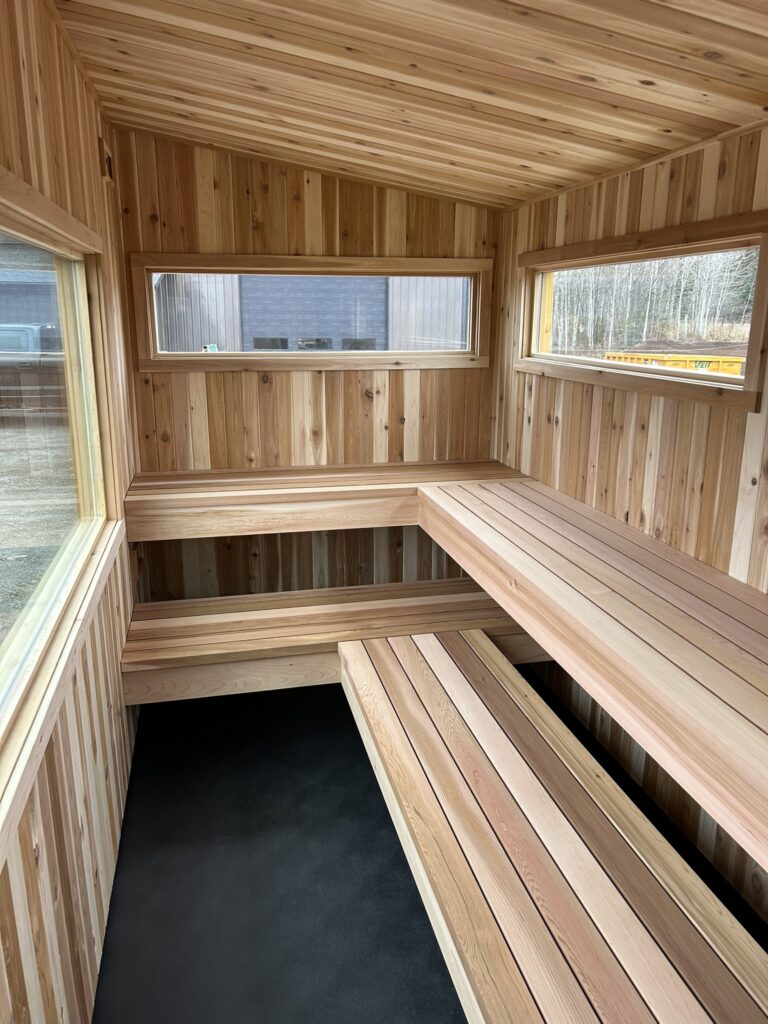



The questions that come up on a jobsite are narrower than that. Where does the water go when it runs off a window jamb. Whether an unvented rafter cavity is a problem or a non-issue. What happens to a sealed assembly when you tow it down a freeway at 65 miles an hour. Guides skip those because the answers come from building the same thing a few hundred times and seeing what fails.
This post covers the parts of a custom sauna build that get argued about online and settled in the shop.
The assumption behind most of the bad advice is that a sauna is a high moisture space. For a few minutes a session, it is. The rest of the time it is the driest room on the property.
Throw water on the rocks and the room is humid. Then the stove keeps running, or the wood stove sits there warm after everyone leaves, and the whole room dries out hard. An electric element does the same thing. The heat coming off it is dry heat, and it pushes through everything in the room.
That changes what the wall assembly has to do. Cedar absorbs moisture during the session and releases it during the dry down. Very little of it ever reaches the vapor barrier. The job of the assembly is not to fight a flood. It is to keep the small amount of moisture that does move out of the wall cavity, and to give the wood air on both faces so it can dry.
- Foil, never plastic. Plastic can soften and off gas at sauna temperatures, and foil reflects heat back into the room.
- Keep moisture inside the sauna. Where it goes after that matters less than whether it gets into the cavity in the first place.
An untaped vapor barrier is worse than no vapor barrier. Every seam and hole you leave open becomes the one path moisture takes, so instead of a wall that breathes evenly you get a single concentrated spot that rots or molds. If you are not going to seal the seams, the sheet is not doing the job you installed it to do.
The long online arguments are about staples and furring strip fasteners. A staple driven into a stud pinches the foil against solid framing. There is no air path through it. Would taping every staple be marginally better, in theory. Probably. It is a fraction of a percent on an assembly where the real failures are somewhere else entirely. Nobody tapes the nails holding their furring strips on, because you cannot.
The principle underneath it is air sealing. If air cannot move through a penetration, the penetration is irrelevant.
The place that does deserve attention is where the foil meets the floor. The barrier should overlap the flooring, not tuck behind it, so anything that does run down behind the cedar comes out on top of the floor and drains. Foil tape bonds well to wood and to itself. It bonds poorly to vinyl. The fix is to seal the flooring to the framing with flashing tape first, then tape the foil to the flashing tape. Two bonded layers instead of one that is working against the surface it does not like.
Installing furring strips is not the win. Installing them so air can move is the win.
The strips exist so the dry air in the room can reach both faces of the cedar. Moisture pushes through the cedar during a session. Dry air pushes back through it afterward and takes the moisture with it. That only works if the air behind the cedar has somewhere to go.
- Never create a sealed cavity. Any pocket of trapped air between two strips is a spot that cannot dry.
- Vertical cladding over vertical strips: leave gaps. Going solid down a stud line is fine only if you hold the strip down from the top by at least an inch so air can circulate over it.
- Horizontal strips: overlap or break them so air moves between the runs.
The mistake that shows up most often is at the top of a window. A continuous strip across the head of the opening is a dam. Water coming down has nowhere to go and sits there. It is the same error people make with exterior rain screens, and it fails the same way.
One more from the install side: do not butt the strips tight into the corners. Getting foil to sit in a perfect right angle is close to impossible, and a perfectionist jamming a strip into that corner tears the barrier. A tear in a corner is the one tear that is close to impossible to tape reliably.
Condensation runs off glass. That is not a defect, it is physics, and the detail either sends that water somewhere harmless or into the wall.
The jamb gets extended past the framing so it finishes flush with the face of the cedar. With a three quarter inch furring strip and three quarter inch cedar, the jamb projects an inch and a half into the room. Water running off the jamb then lands on top of the cedar and runs down the face of the wall, where it dries, instead of running behind it.
The second half of that detail is taping every window opening to the vapor barrier. If anything does get behind the cedar, it runs on top of the foil, down to where the foil overlaps the flooring, and out onto the floor. The whole assembly is one continuous drain path with no dead ends in it.
Spray foam is a separate question. It does not belong in a sauna wall as insulation, but it still has a role around openings. The thing to watch is that foam, shims and framing all move at different rates under heat, and glass does not move at all.
Which is why the glass is not held rigid. Jambs are shimmed and fastened hard to the framing, and then the glass sets on cork with at least an eighth of an inch of reveal on every side. The cork squishes, the frame shifts a fraction, and nothing ever makes hard contact with the edge of the glass.
There is no window on the market designed for a sauna. Building the window system in house is the only way to control that detail, and it has a side benefit: a custom opening does not come with an eight week lead time.
The venting question splits on whether there is dead air in the assembly.
A pitched roof built as a packed rafter cavity gets no vent space. A two by six rafter bay filled solid with insulation, tight to the sheathing on one side and tight to the vapor barrier on the other, has no void for air to sit in. Condensation needs a surface and moving air to form on. Remove the gap and you remove the mechanism. Heat still transfers slowly from warm to cold through the insulation, which is what insulation is for.
The moment there is an attic or any dead space above a flat ceiling, that space gets vented, either through the soffit or at each end of the building. The rule is simple: if there is a cavity with air in it, give that air a way out.
The critical part of that is full contact. If the insulation does not reach the sheathing and the vapor barrier, the gap you left behind it is exactly the void you were trying to avoid.
People expect a sealing problem here and get the detail backwards. Trying to glue a seal directly to a hot pipe puts an adhesive through years of thermal cycling, and it will fail.
The approach that holds up is to give the heat room instead. A 12 inch by 12 inch steel box takes the penetration through the roof. Double wall insulated pipe runs up into it and back out of it, so the heat stays inside the insulated pipe. The box itself is uninsulated and open to the roof deck, so there is cool air around it and it never gets hot.
The foil tape seals to the box, not to the pipe. The box barely changes temperature, so the seal is not cycling, and the whole detail reduces to the oldest rule in the book: build clearance to combustibles into the assembly and seal to something that stays cool.
The floor is built as a pan before anything else goes in. Vinyl goes down first, under and behind everything, wrapped up the wall. The whole building sits in a waterproof tray. On a tiled floor the same logic applies, with the pan wrapped four to six inches up the wall so the vapor barrier can seal to it and the cedar can run past to cover the edge.
Under the stove, the stack is vinyl, then Durock, then a powder coated steel heat shield that extends past the footprint of the stove. Embers that drop while someone is loading wood land on steel, not on vinyl. Wall shields go in where they are required, with a one inch air gap behind them. The gap is the part that does the work.
How much shielding you need is a function of the stove, and this is the piece that catches people. A stove with a large rock mass holds its heat in the rocks, and the outside of the unit never gets as hot. That can allow the edge of the stove to sit within a few inches of wood with no issue. A bare steel firebox is a different animal. The outside of that steel runs close to the temperature of the fire inside it, which means a foot of clearance to anything combustible.
That difference is why we specify the stove and the clearances together rather than treating the stove as a product the customer picks at the end.
It is not a theoretical risk. A crew we work with built their own sauna, sourced parts from us, and burned it to the ground. The likely cause was single wall stove pipe run too close to combustible material. When a detail is borderline, the right move is to go past the recommendation rather than meet it.
For the one remaining exposure, which is someone dropping an ember on vinyl while loading the stove, a two foot fire resistant mat set down during loading and cleanout solves it.
The building codes assume your sauna stays where you put it. Nothing in them covers a structure going down the freeway at highway speed, or sitting in a region that gets earthquakes. That gap is filled by the builder or it is not filled at all.
The single biggest failure mode on a mobile unit is the building coming off the trailer. The trailer frame is engineered to be towed. Whatever sits on top of it has to behave as one piece with that frame.
- A treated two by four plate runs around the entire frame, screwed to it every 16 inches.
- The subfloor fastens to that plate.
- The walls are built on the subfloor and then bolted through into the trailer frame with five inch bolts, a second independent connection.
- The exterior sheathing overlaps the subfloor and the plate and is stapled the full length, which ties the wall system to the frame a third time.
The sheathing overlap is the part that is easy to leave out and expensive to leave out. Without it the structure can rack back and forth over the plate. With it, the building cannot move independently, so it bounces with the trailer instead of against it.
The instinct to isolate the building from the frame with a layer of rubber is the wrong instinct. Any layer that lets two parts move separately invites them to shear, and it hands you a resonance problem: give the assembly a gap and a frequency it likes and it will vibrate in it. Pull every layer down tight to the one below it and there is no space for that to happen.
Tile is the other mobile exception. On a stationary build, tile is a good option, and the fear that a post foundation will pop tiles is mostly misplaced. People tile over wood floors every day. When tiles do pop loose it is almost always a void in the thinset, a hollow spot that breaks free from repeated foot traffic, not foundation movement. On a mobile unit it is a different calculation. Everything on that trailer flexes and twists a little every mile, and tile is the least forgiving material you can put in that environment. Where it has been used, epoxy grout is what holds up.
Most guides say to wash the sauna down and leave it there. That is not an instruction anyone can follow, and it is the gap that matters most for a sauna running as a revenue asset.
Start with what not to do. No soap on the interior. No household cleaners. Plain water handles most of it, and where a business needs more, there are mild cleaners formulated for saunas that mix at roughly a capful to a bucket and will not corrode the metal on the heater.
The staining problem is a moisture problem. Benches go brown where people sit because wood absorbs sweat and water, and any dirt in that water goes in with it. The fix is a sauna specific wax rather than an oil. The wood takes it in and then stops taking anything else in, so sweat and water bead on the surface and rinse off. It goes on the surfaces that take contact: benches, backrests, window sills, the traffic areas on the floor. Trim and walls usually do not need it.
The part that no schedule can answer is how often. A property putting 50 people through the room every day and rinsing benches nightly is on a completely different cycle than one doing 50 people a month. So do not use a calendar. Use the water test.
That single test is worth more to an operator than any recommended interval, because it works regardless of how busy the season was.
Every item above is a decision someone made before the sauna arrived, and almost none of them are visible once the cedar is on. That is the real argument for asking harder questions during the quoting process rather than after.
- Where does water that runs off the glass go.
- Does the foil overlap the flooring, or tuck behind it.
- How is the stove pipe penetration sealed, and to what.
- What are the clearances for the specific stove being quoted, not for stoves in general.
- On a mobile unit, how is the structure tied to the trailer frame.
- What does maintenance look like at the traffic volume this property will see.
If you want these details worked out for a specific site, that is the conversation to have before anything is ordered.
Book a sauna consultation