

A backyard sauna is one of the few structures a capable DIYer can build start to finish. It sits under permit thresholds in most jurisdictions. It uses standard framing. The materials fit in a pickup. This is the full build sequence we use, phase by phase, with the mistakes we see other builders make and how to avoid them.
A house is not a DIY project. A sauna is. A backyard sauna under roughly 200 square feet falls below the accessory structure permit threshold in many jurisdictions, which means no paperwork, no inspections, and no plan review. Verify your local code before you order lumber. Thresholds vary by state, county, and city, and electrical work almost always requires a licensed electrician regardless of structure size.
The work is within reach. A sauna is a small, forgiving structure: standard framing, materials that fit in a pickup, and a footprint one or two capable people can knock out over a week or two of weekends. The skills it asks for are drill, saw, and level skills, not finish carpentry. If you can frame a shed, you can frame a sauna. And building it yourself means you know exactly what went into every wall.
Two parts of the build are not DIY. Electrical must be done and certified by a licensed electrician. The heater install must follow the manufacturer's manual to the inch, and if you are not confident reading clearance diagrams, hire it out. Everything else is framing, insulation, and cladding.
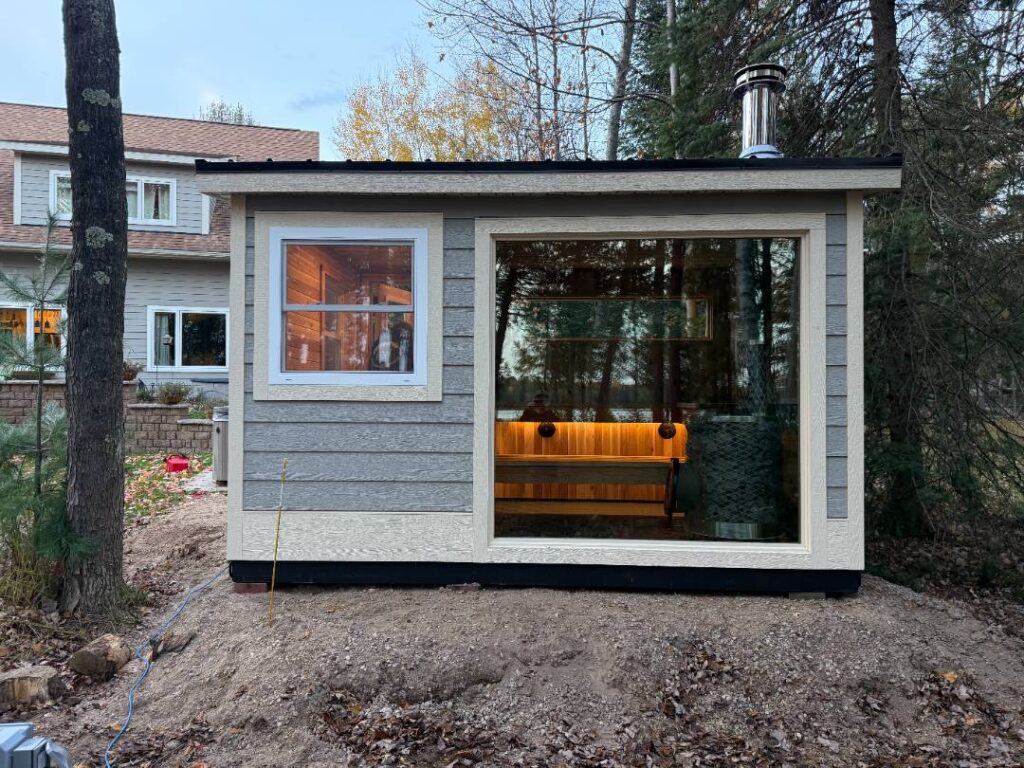
The pattern behind bad saunas. We get asked to look at failing saunas from other builders. The failures almost always trace to two shortcuts: insulation packed with gaps, and vapor barrier seams left untaped. Both are invisible once the cedar goes on. Both are covered in detail below. Get these two right and your sauna outlasts the shortcuts by decades.
This schedule assumes two people, basic tools, and materials staged on site. A floor platform with insulation is a four hour job for two people who have never done it before. Everything else scales the same way.
The most common mistake in American sauna building is making the structure too small. Builders size for the hot room and forget everything else. In Finnish and Slavic sauna culture, the space for cooling down, drying off, changing, and having tea between rounds often takes 60 to 70 percent of the total footprint. The hot room itself does not need to be large. It needs to be efficient.
Think through a full session before you commit to a layout. You go in, you get hot, you come out. Then what? If you are walking to a lake, you need a path and a place to rinse your feet before going back in. Nobody wants to track grass and dirt across cedar. If you sauna year round, you need a covered, dry space between rounds. If it is a summer cabin sauna and you plan to stand on a deck, a hot room alone can work.
| Footprint | What it gives you | Best for |
|---|---|---|
| 6×8 ft | Hot room only, 3–4 people | Minimum viable build. Budget builds paired with an existing deck or porch. |
| 8×8 ft | Hot room only, 4–6 people | Summer season use where cooldown happens outside. |
| 8×10 ft | Hot room plus small entry | A dry spot to hang towels and wipe feet. |
| 8×12 ft | Hot room plus changing room | The sweet spot. Year-round use, a bench to sit on between rounds. |
| 8×16 ft | Full hot room plus full relax room | The traditional layout. Tea, towels, chairs, a real cooldown space. |
Why 8 feet wide is the smart dimension. Framing lumber and sheet goods are built around 8 foot modules. At 8 feet wide, a 4×8 sheet of OSB lands cleanly on joist and stud centers with no extra blocking and no stagger cuts. Going wider means cutting sheets and adding blocking at every edge. Going past 10 feet may also push the structure over your local permit threshold. Stay at 8 and the whole build gets simpler.
A sauna is a light structure. You do not need an engineered foundation. You need something level, stable, and off the ground. Pick based on your soil and budget.
| Option | How it works | Honest assessment |
|---|---|---|
| Concrete blocks | Solid 14×14 inch blocks set on tamped, level ground | Cheapest and fastest. Fine on hard ground or clay, and the right call for a two-week, zero-to-finish build. Plan on releveling within the first year. |
| Sonotube piers | Poured concrete piers below frost line | The permanent answer in frost-heave regions. More digging and curing time, near-zero movement after. |
| Ground screws | Helical posts driven by hand or machine | The other permanent answer. No digging, no curing, adjustable height, works on sloped or uneven sites. Where we push people who want to set it and forget it. |
| Concrete slab | Poured pad, structure anchored on top | Only necessary if you want a tile floor with a real drain, or the sauna doubles as a shower space. |
Use enough blocks that no single point carries a disproportionate share of the load, or the structure will sink in one corner. If you set cheap blocks on clay, or dig past the topsoil into sand, expect the sauna to settle unevenly within the first year. That is not a disaster. A sauna is light enough that a good jack relevels it in an afternoon, and after that first correction it settles in and should not move much. But like any shed, if you load one spot consistently, that spot sinks.
The consistent load is your heater. A loaded stove with stones is the heaviest thing in the building and it never moves. Place it directly over a foundation block, and position that block so it shares load with its neighbors rather than sitting isolated in a corner. A corner block carrying the stove alone is the classic one-corner-sinks setup. If a permanent, no-maintenance install matters to you, this is exactly why we push piers or ground screws.
Block layout logic. The stove is the one load that never moves, so it gets its own block, off the corner.
Whatever foundation you choose, get it level and confirm it twice. Everything else in the build references the floor. If the platform is out of level, the walls read out of level, the ceiling reads out of level, and every cedar board reminds you of it.
Frame the platform in treated lumber. Untreated framing this close to grade will rot. Use 2×6 joists at absolute minimum, 2×8 if you want the stiffer platform. The floor only needs about 4 inches of insulation, so you are not filling the cavity. You are supporting a 4 inch layer inside it. An uninsulated sauna floor is a cold sink that fights your heater every session.
Set joists at 16 inches on center so your subfloor sheets land on centers. Where the heater will sit, add extra blocking between joists and make sure your subfloor is thick enough for the point load. A loaded wood stove with stones can pass 500 pounds. Run a full bead of subfloor adhesive down every joist and nail the sheets down with ring-shank nails. Glue plus nails is the standard glue-nailed floor system: the glue kills flex and silences squeaks, the ring shanks hold for good, and if you ever tile over an uncoupling membrane, that stiffness is what keeps the tile alive. Screws also work if a nailer is not in the budget, but nails are how the floor goes down fast.
A 4 inch insulation layer needs support underneath or it sags out of the cavity. Two ways to hold it:
Membrane method. Before assembly, tip each joist vertical and staple a mesh or breathable fabric membrane across the bottom edges. The membrane hammocks the insulation in place.
Furring strip method. Nail furring strips along the bottom 2 inches of each joist's inside face, then rest thin, cheap sheet stock on the strips to carry the 4 inches of insulation. If you go this route, drill ventilation holes through the bottom sheet so any moisture that reaches the cavity has a way out.
Standard 2×4 framing at 16 inches on center handles both exterior and interior walls. A 2×6 wall buys you more insulation depth, but for a small hot room it is rarely necessary. Spend that money on the heater.
Every opening gets the same anatomy. King studs run full height on each side. Jack studs (trimmers) nail to the kings and carry the header. The header spans the opening. For a small sauna, a doubled 2×6 header handles typical window and door spans. Cripple studs fill above the header and below the window sill to keep the 16 inch layout continuous. Size the rough opening to the window manufacturer's spec, typically the unit dimension plus about an inch of shim space on each side. Check the sticker on the window before you cut.
The anatomy of every opening. The sequence loops so you can watch it assemble.
Square each wall on the platform before it goes up by measuring diagonals. When the diagonals match, the wall is square. Then lock it so it cannot rack into a parallelogram. Two options: cut let-in channels across the studs and screw in a wood diagonal brace, or run metal strapping from a hardware store diagonally across the studs and screw it flat. Either works. Skipping both is how walls shear.
Why bracing is not optional. A square of studs has no resistance to shear until something crosses it diagonally.
Alternatively, sheet each wall with OSB while it is flat on the platform. Sheathing is bracing. Just count your crew first. A sheeted 8 foot wall is heavy, and you need enough hands to stand it safely. Set temporary bracing before standing any wall, and if the wall is pre-sheeted, position the braces so the wall bottom and the rim joist meet cleanly at the corner.
Tie the walls together with an overlapping top plate. The second plate laps across the corner joints so each wall binds to its neighbors. Fasten walls to the floor platform and to each other with structural screws sized per the fastener manufacturer's tables. Sheet the walls so every OSB edge lands on a stud or plate. At 8 feet wide on 16 inch centers, they will.
Relevel after the walls go up. If your platform sits on blocks, expect it to move once you start working on it. You built it, tarped it, came back, stood four walls, and now the weight and the foot traffic have shifted things. Check the platform for level again after the walls are standing, shim or jack as needed, and keep checking through the project. An out-of-level floor will convince you your walls are out of plumb when they are not.
For an 8 foot span, 2×8 rafters are the safe answer. You can sometimes get away with 2×6 on a span this short, but 2×8 gives you insulation depth in the ceiling, and ceiling insulation matters more than wall insulation. Heat goes up. At this size you do not need much pitch. A shallow shed pitch that drains water is enough.
Fasten every rafter with an L bracket on both sides, screwed properly, plus a nailing pattern per standard rafter-to-plate schedules. Brackets alone or toenails alone are each half a connection. Use both.
To extend the roof past the gable walls, cut channels into the last two interior rafters, run lookout blocks through the channels, and anchor an outrigger rafter beyond the wall line. The lookouts, typically 2×4 stock, cantilever the overhang and carry the outrigger. An overhang keeps rain off your siding and your door. Worth the extra hour.
Sheet the roof with 1/2 inch plywood, edges landing on rafters, small expansion gap between sheets. Then the water stack, in order: drip edge at the eaves, ice and water shield, underlayment wrap, then metal roofing. Metal is the default for a sauna roof. It sheds snow, outlives shingles, and installs in an afternoon at this scale. If you shingle instead, follow standard shingle practice, but on a structure this small, steel is less work and lasts longer.
Level and square, again. Everything stacks. An unlevel platform becomes unlevel walls becomes an unlevel roofline. Check level and square at every phase with a proper level, one yard long minimum. A torpedo level is for hanging pictures, not framing.
Set each window plumb, level, and centered in its rough opening, shimmed per the manufacturer's instructions. Seal the perimeter gap with low-expansion spray foam. High-expansion foam can bow a window frame. Flash the opening properly on the exterior so water sheds over, not behind, the layers below.
Electrical is the one contracted trade in this build, and there is no version of this guide where you wire it yourself. Hire a licensed electrician to run and certify the work. Rough-in happens now, after framing and before insulation. What to spec with them:
| Item | What to tell the electrician |
|---|---|
| Heater circuit | If electric, most residential sauna heaters need a dedicated 240V circuit sized to the heater. Bring the heater's spec sheet to the conversation. |
| Lighting | Vapor-sealed fixtures rated for sauna temperatures, mounted low or behind bench lines where heat is gentler. |
| Controls | Heater controls and switches mount outside the hot room or per the heater manual. |
| Penetrations | Every wire and box that passes into the hot room is a future hole in your vapor barrier. Plan locations now, seal them at the barrier stage. |
Most backyard saunas do not need a drain. Choose based on how much water you will realistically use. For the majority of builds, the simplest option is also the right one: seal the subfloor and lay a rubber mat. It is what we run in our own mobile saunas.
Step up to a corner drain only if you expect the occasional bucket-scale spill, and to a full sloped floor only if the sauna doubles as a wash space. Each step up multiplies the labor and cost, so match the strategy to how you will actually use the room.
| Strategy | Build | Honest assessment |
|---|---|---|
| No drain | Prime or paint the subfloor to seal it, lay a rubber mat over the top | Fine for most builds. Löyly water evaporates. Keep a mop for the rare spill. This is what we run in our own mobile saunas. |
| Corner drain | Flat floor, single drain pipe in a corner | An insurance policy. Catches a bucket-scale spill without the cost of a sloped floor. |
| Full sloped floor | Concrete or mortar bed sloped to a drain like a shower pan, tiled over an uncoupling membrane | Required if you will shower inside or throw serious water. The most work and cost by a wide margin. |
Standard fiberglass or mineral wool batts work. What separates a good insulation job from a lazy one is fit. Cut each batt slightly larger than the cavity so it sits snug against the studs. A standard 16 inch on center bay leaves a 14.5 inch cavity, and batts for that layout come 15 inches wide for exactly this reason: the extra three quarters of an inch lets the batt compress gently into place and grip the studs. Cut custom pieces the same way, about three quarters of an inch proud of the opening. Snug, not crushed. Insulation works by trapping air, and packing it so tight it loses loft destroys its value. So does leaving it loose with gaps.
Push each batt fully to the back of the cavity so there is no void behind it, then make sure it fills to the face. Check every cavity when you think you are done. When we inspect failing saunas from other builders, gapped insulation is the first thing we find. The math is unforgiving: a one inch gap at the top of every stud bay, multiplied across the whole wall, adds up to the equivalent of a hole in your envelope. One hundred percent filled is the standard. Not 95.
The hot room gets a foil vapor barrier over the insulation, and it must be comprehensive. Its whole job is holding steam and moisture inside the room so it never reaches your wall cavity. A vapor barrier with untaped seams is a vapor suggestion. This is the second failure we find in bad saunas: corners not taped together, ceilings skipped entirely.
The standard:
| Detail | Requirement |
|---|---|
| Every seam | Overlapped and taped with aluminum foil tape. Not house tape, not duct tape. Aluminum. |
| Corners and ceiling | Wall foil ties into ceiling foil, taped continuous. The ceiling is not optional. Steam goes up first. |
| Floor transition | Foil laps down and tapes to the floor trim line so the envelope closes at the bottom. |
| Windows and penetrations | Foil taped tight to window frames, electrical boxes, and vent collars. |
| Staple and screw holes | Tape over them where possible. Every hole is a leak. |
After the barrier is sealed, install furring strips over it. This is the step builders skip because they do not understand it, and it is non-negotiable. The vapor barrier does not work in solid contact with wood. Moisture that condenses on the foil needs a gap to shed and dry. Cladding nailed directly to the foil traps that moisture against your cedar. The furring strips must be thick enough that the finished cedar never touches the barrier.
The two invisible failures. Gapped insulation and unsealed vapor barrier are both completely hidden the day the cedar goes on. The sauna looks identical either way. The difference shows up in year three as rot in the wall cavity. Take the extra afternoon.
The hot room wall assembly, exterior to interior. The gold layer and the air gap beside it are what most bad saunas are missing.
Bring the cedar inside and let it acclimate at room temperature before installation. Cold boards installed in a warm room move. Wet boards installed anywhere move more. Give the wood time to dry and stabilize first.
Work from the bottom up. Brad nail through the tongue into the furring strips, and set your nail depth so the brads never pass through a strip and puncture the vapor barrier behind it. Leave a small expansion gap at ends and edges. Cedar breathes with heat and humidity, and boards fitted dead tight will cup or buckle.
Wood selection is a budget lever. Knotty cedar is the standard for walls and looks right in a sauna. Clear cedar is a step up in price and appearance, nice but not necessary on walls. Where clear grade matters is the benches: knots get hotter than the surrounding wood and can weep sap under heat. Bench tops belong in clear cedar, or aspen if you prefer a paler, cooler-touch wood. A budget build can clad walls in pine and put the cedar money into the heater. Build benches so they lift out or unclip for cleaning and airflow.
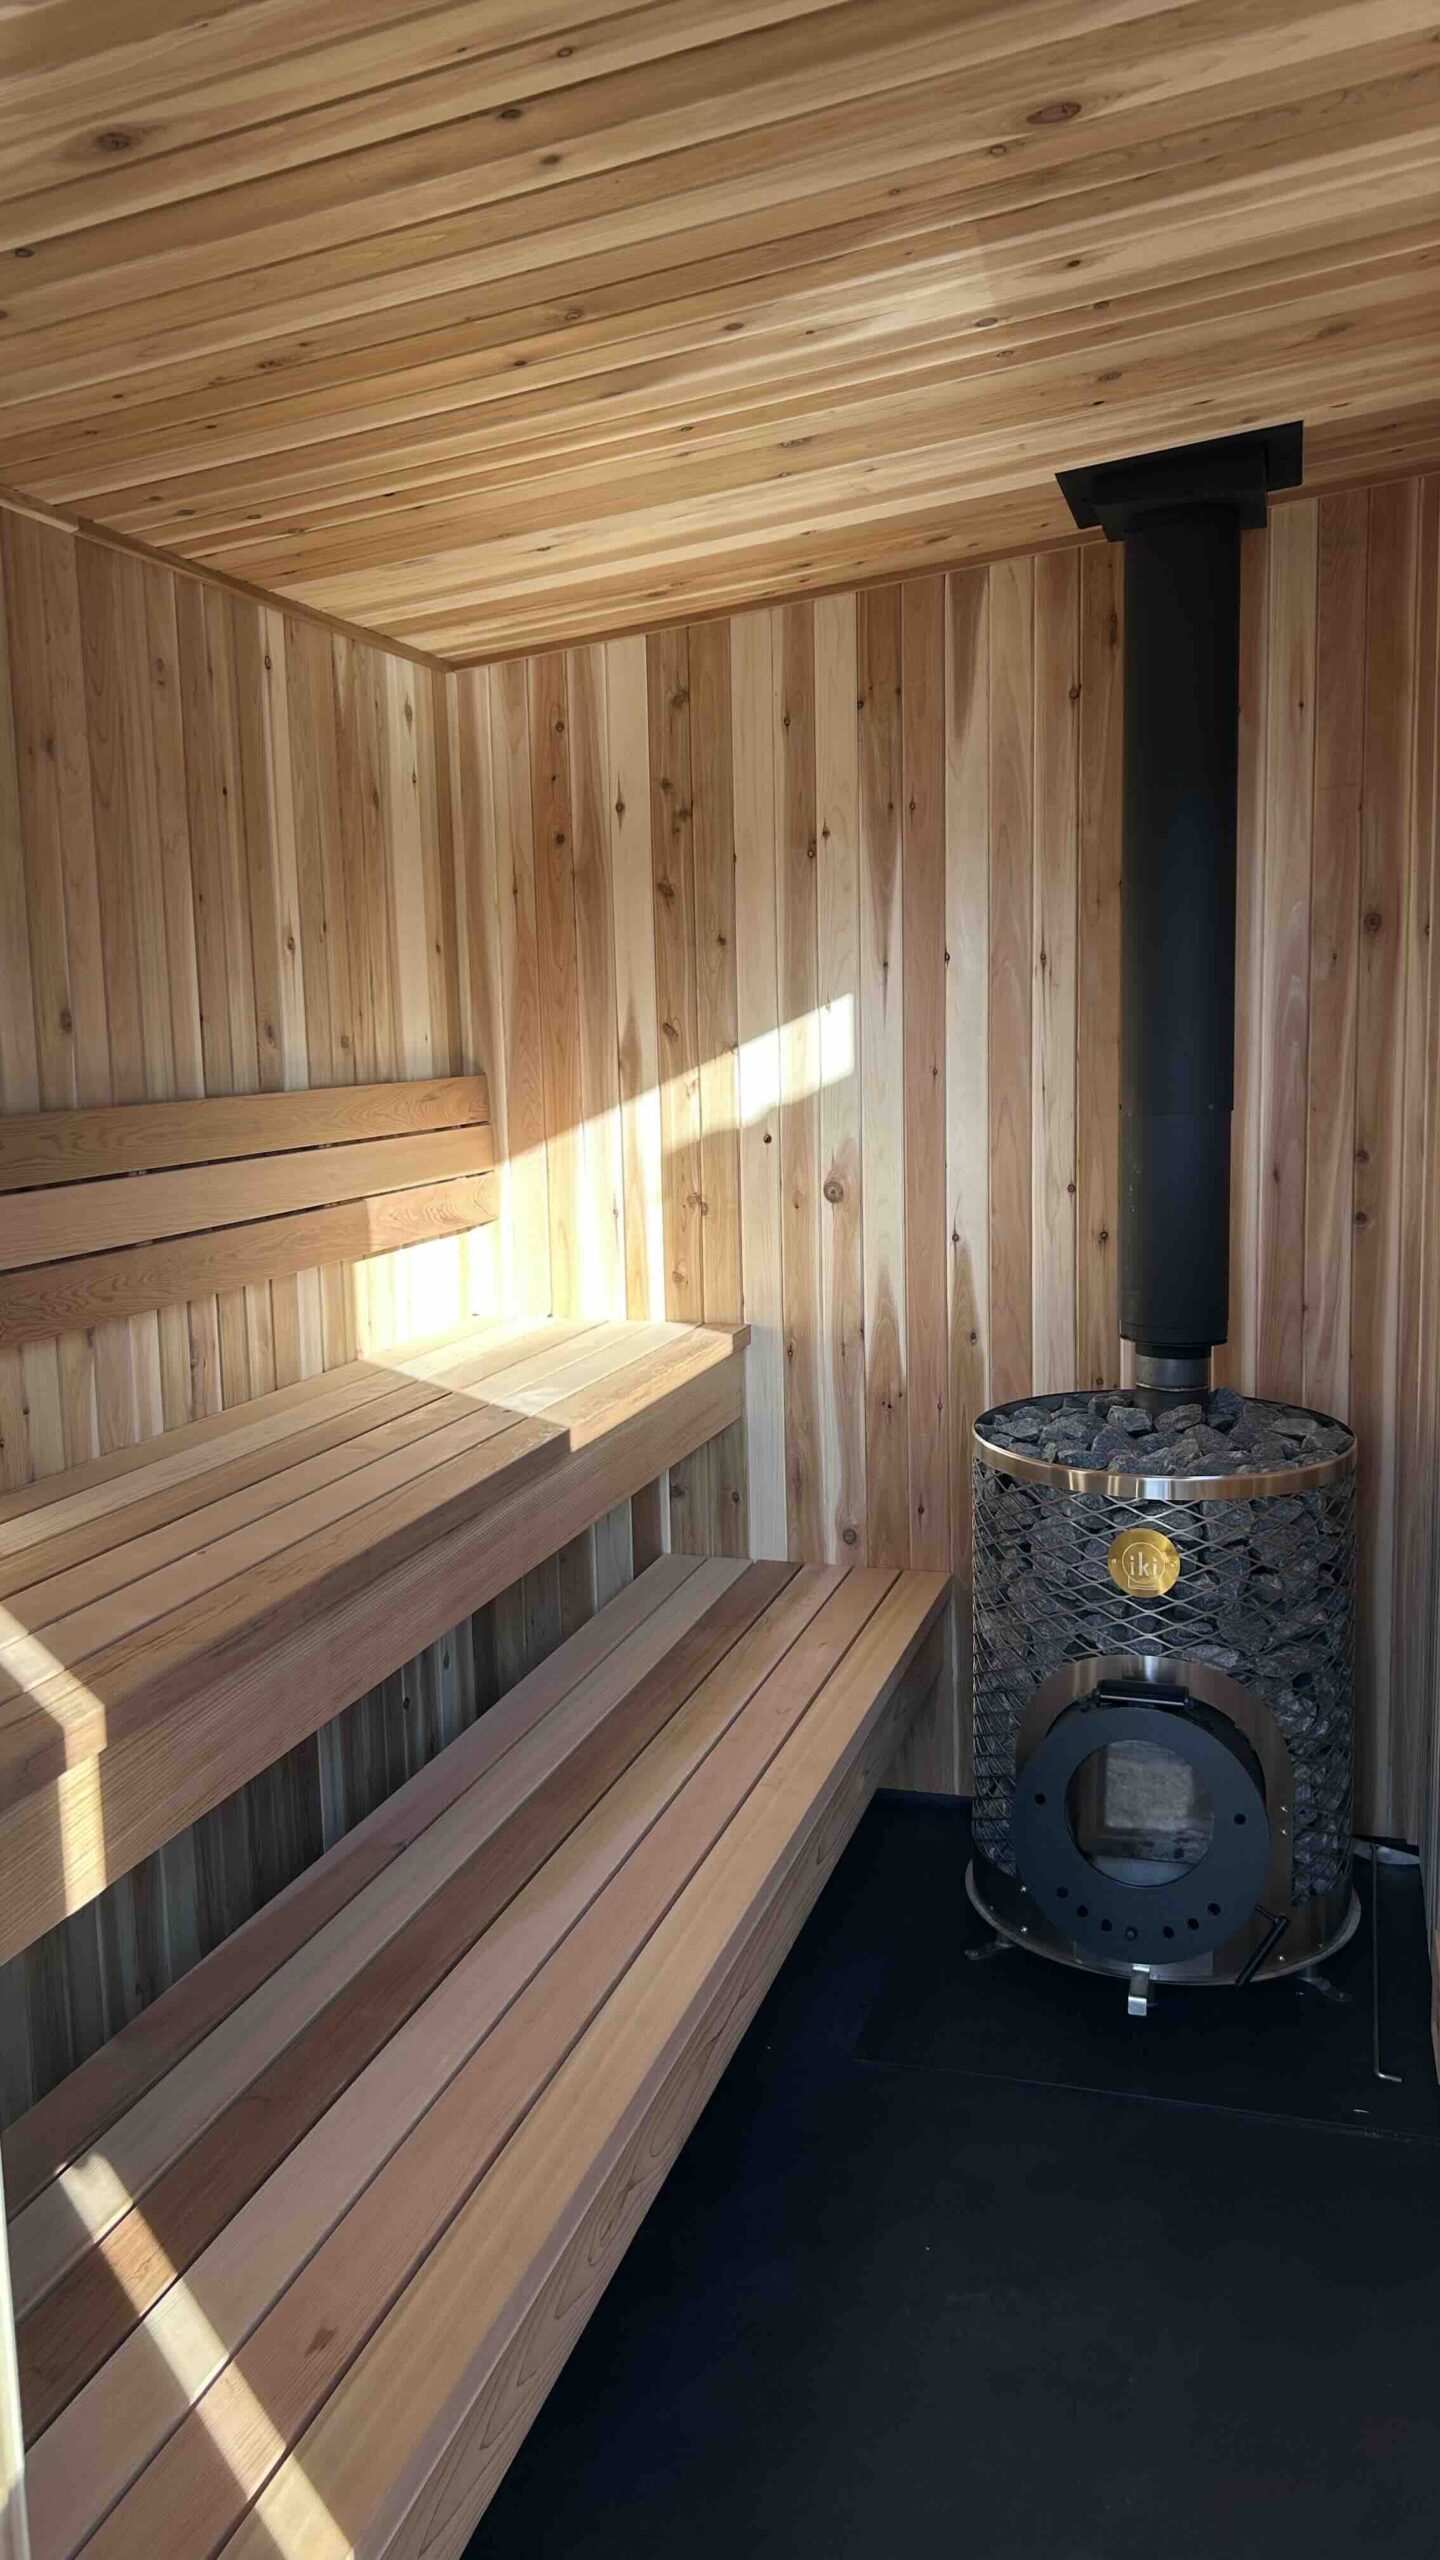
A sauna needs to breathe. The simple, proven layout: a supply vent low near the heater bringing fresh air in, and an exhaust vent on the opposite side of the room, with adjustable covers so you can tune airflow per session. A wood-fired stove also needs combustion air, which is part of why the supply vent near the stove matters. Frame the vent openings during the wall phase, seal the foil barrier tight to the vent collars, and fit the covers now.
Every heater ships with a manual that specifies exact clearances to combustible materials, established through UL listing and testing. Those numbers are not suggestions and they are not universal. They change by manufacturer, model, and shielding configuration. The manual for your specific heater is the authority. What follows is the framework so you know what you are reading.

| Element | What the manual will require |
|---|---|
| Floor protection | The stove sits on a non-combustible surface extending beyond the stove on all sides, furthest in front. As an example, Kuuma specifies at least 8 inches past the back and sides and 18 inches in front of the stove base. |
| Front clearance | The loading side gets the largest clearance and cannot be shielded down. Kuuma requires a full 48 inches from the fuel door to any combustible material. |
| Side and rear clearances | Unshielded clearances are large, roughly 28 to 38 inches on a Kuuma. Stove-mounted heat shields plus a non-combustible wall shield with a 1 inch air gap bring that down to as little as 7 to 8 inches. This is why heat shields exist. Order them with the stove. |
| Wall shields | Cement board or equivalent, held off the wall on 1 inch non-combustible spacers so air moves behind it, raised roughly 4 inches off the floor, extending about 8 inches past the stove on each side. Never screwed flat to the wall. The air gap is the shield. |
| Stove pipe and chimney | Single-wall pipe needs 18 inches to combustibles. Passing through the ceiling and roof requires a listed insulated Class A chimney system with its manufacturer's support box, insulation shield, flashing, and storm collar. Never run single-wall pipe through a ceiling. Install a damper in the first pipe section. |
Electric heaters swap the chimney for a dedicated 240V circuit and swap the floor pad rules for the manual's mounting heights and clearances, but the discipline is identical: exact model, exact manual, exact inches.
Honest advice. If reading a clearance diagram makes you nervous, this is the phase to bring in a pro for a few hours. The rest of the sauna is forgiving. The stove install is not. Concrete board and correct clearances around the heater are what stand between your cedar and a fire.
This is a drill and circular saw project. A framing nailer speeds up day one if you can rent or borrow one, but at this scale the whole frame can be hand nailed. If you own the first four items on this list, you can build a sauna.
Select a size and region and the list recalculates every material in the build, framing through the heater, as a low-to-high price range. Quantities include standard waste factors and round up. Take it to the yard as your order sheet, then adjust for your own window, door, and heater choices.
Quantities are planning estimates for a standard 8 ft wall build on 16 inch centers. Prices are low-to-high ranges drawn from 2026 big-box, lumberyard, and published DIY build references, adjusted by a regional index. They exclude tax, delivery, and electrician labor, which typically adds $1,000 to $2,000. Lumber and panel prices move month to month, and cedar grade swings the interior cost the most. Confirm counts and pricing against your final drawings, window schedule, and heater manual before ordering. Structural fastener sizing per manufacturer tables and local code.
In many jurisdictions, accessory structures under a size threshold, often around 200 square feet, do not require a building permit, which is part of what makes a sauna such a strong DIY project. Thresholds and rules vary by state, county, and city, so verify with your local building department before you start. Electrical work requires a licensed electrician regardless of structure size.
Two things. Electrical, which must be run and certified by a licensed electrician. And the heater installation if you are not confident following the manufacturer's clearance diagrams exactly. Everything else, from foundation to framing to cedar, is within reach of a capable DIYer with one helper.
One to two weeks for two people. The insulated floor platform takes about four hours. Walls take a day, the roof another day, windows and vents a third. Insulation is half a day and the foil vapor barrier takes two to three hours. Interior cedar and exterior siding fill the remaining days, with electrical and the heater install scheduled around them.
On the walls, yes. Pine or other budget softwoods work as hot room cladding and cut material cost meaningfully. Benches are different: knots run hotter than the surrounding wood and can weep sap, so bench tops should be clear cedar or aspen. If the budget forces a choice, put the savings from pine walls into a better heater.
Most backyard saunas do not. A sealed subfloor with a rubber mat over it handles normal löyly use, and a mop covers the rare spill. A single corner drain on a flat floor is a low-cost insurance step. A fully sloped, tiled floor with a drain is only necessary if you plan to shower inside or throw substantial water.
A hot room alone can be as small as 6 by 8 feet. The better question is what happens between rounds. Traditional Finnish and Slavic saunas give 60 to 70 percent of the footprint to the changing and cooldown space. An 8 by 12 foot structure with a hot room and a changing room is the practical sweet spot, and staying 8 feet wide keeps the entire build on standard lumber modules.
Two invisible ones. Insulation installed with gaps, and vapor barrier seams left untaped. Both hide behind the cedar the day the build finishes, and both show up as moisture damage in the wall cavity years later. Cut insulation slightly oversized so it packs snug into every cavity, and tape every foil seam, corner, ceiling joint, and floor transition with aluminum tape.
BW Sauna builds custom traditional saunas out of Duluth, Minnesota, with delivery across the country. Same assembly you just read, executed by people who have done it 50 plus times.
Talk to BW Sauna Optimized by Seraphinite Accelerator